Zendesk Ticketing
Binadox supports Zendesk ticketing that enables a Zendesk administrator to access Binadox notifications from the Zendesk Support account.
This guide provides information on how to configure Zendesk ticketing on the Binadox platform and send Binadox tickets to the support address in Zendesk.
1. Generate an API Token
1. Log into your Zendesk Support account as an administrator.
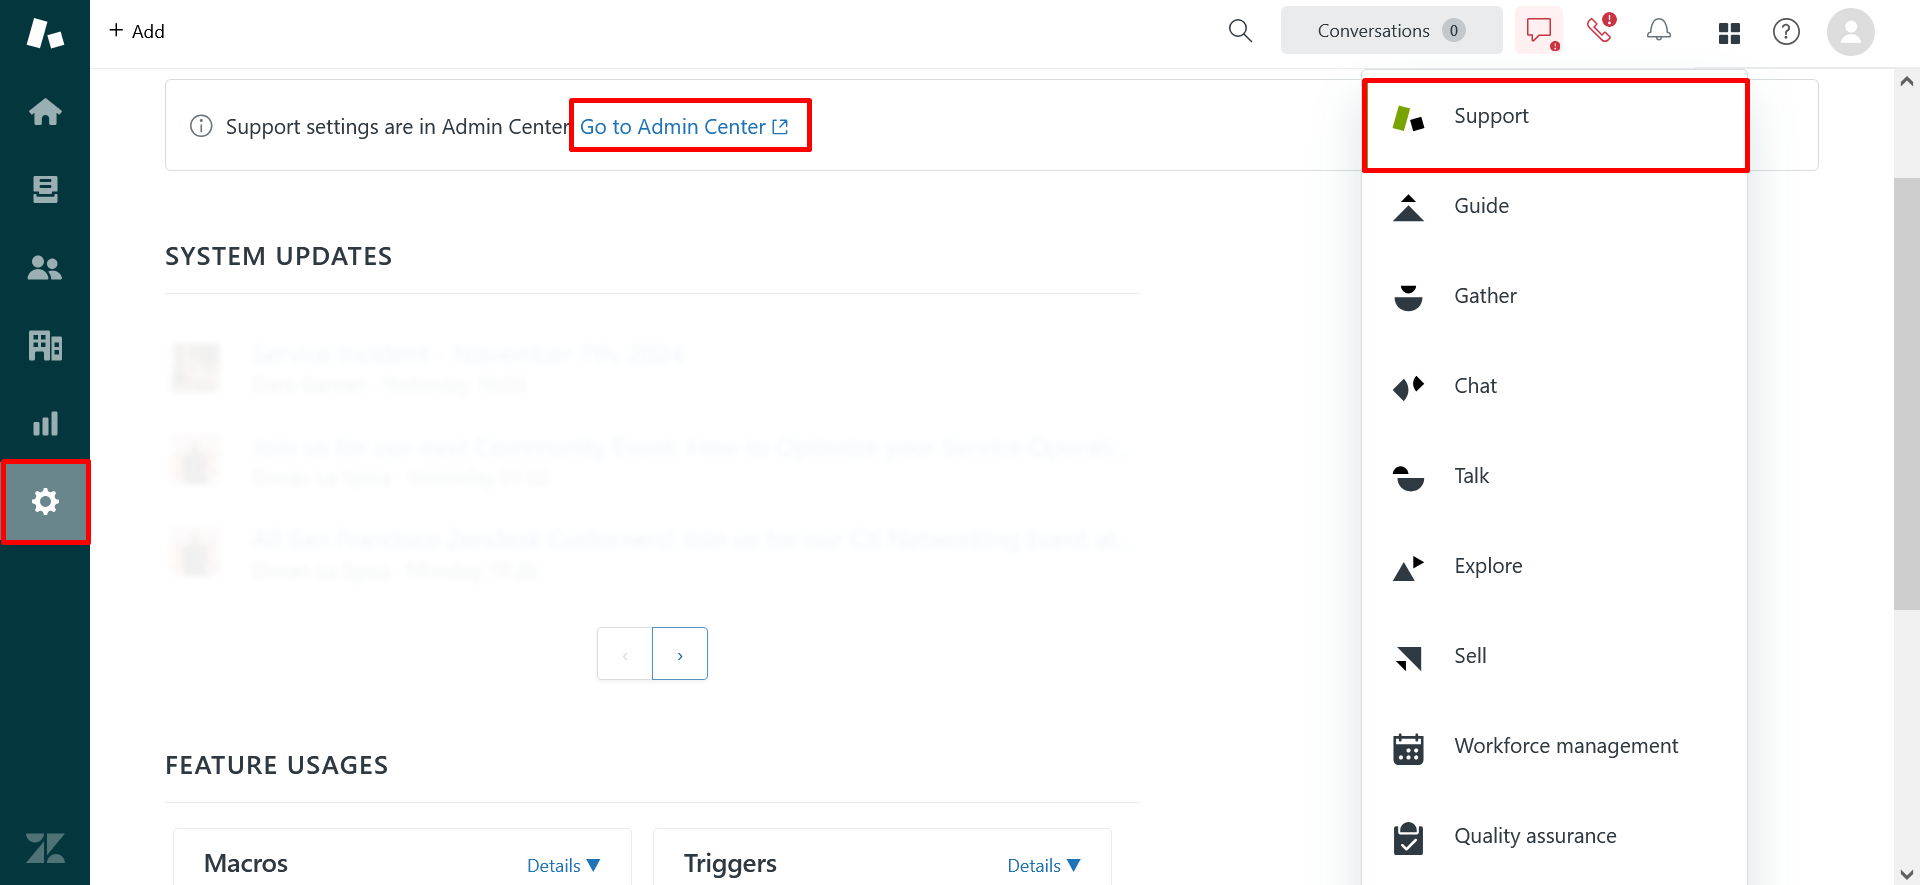
2. From the product tray at the top right corner, select Support. In the navigation pane on the left, click on the gear icon to proceed to the Admin panel.

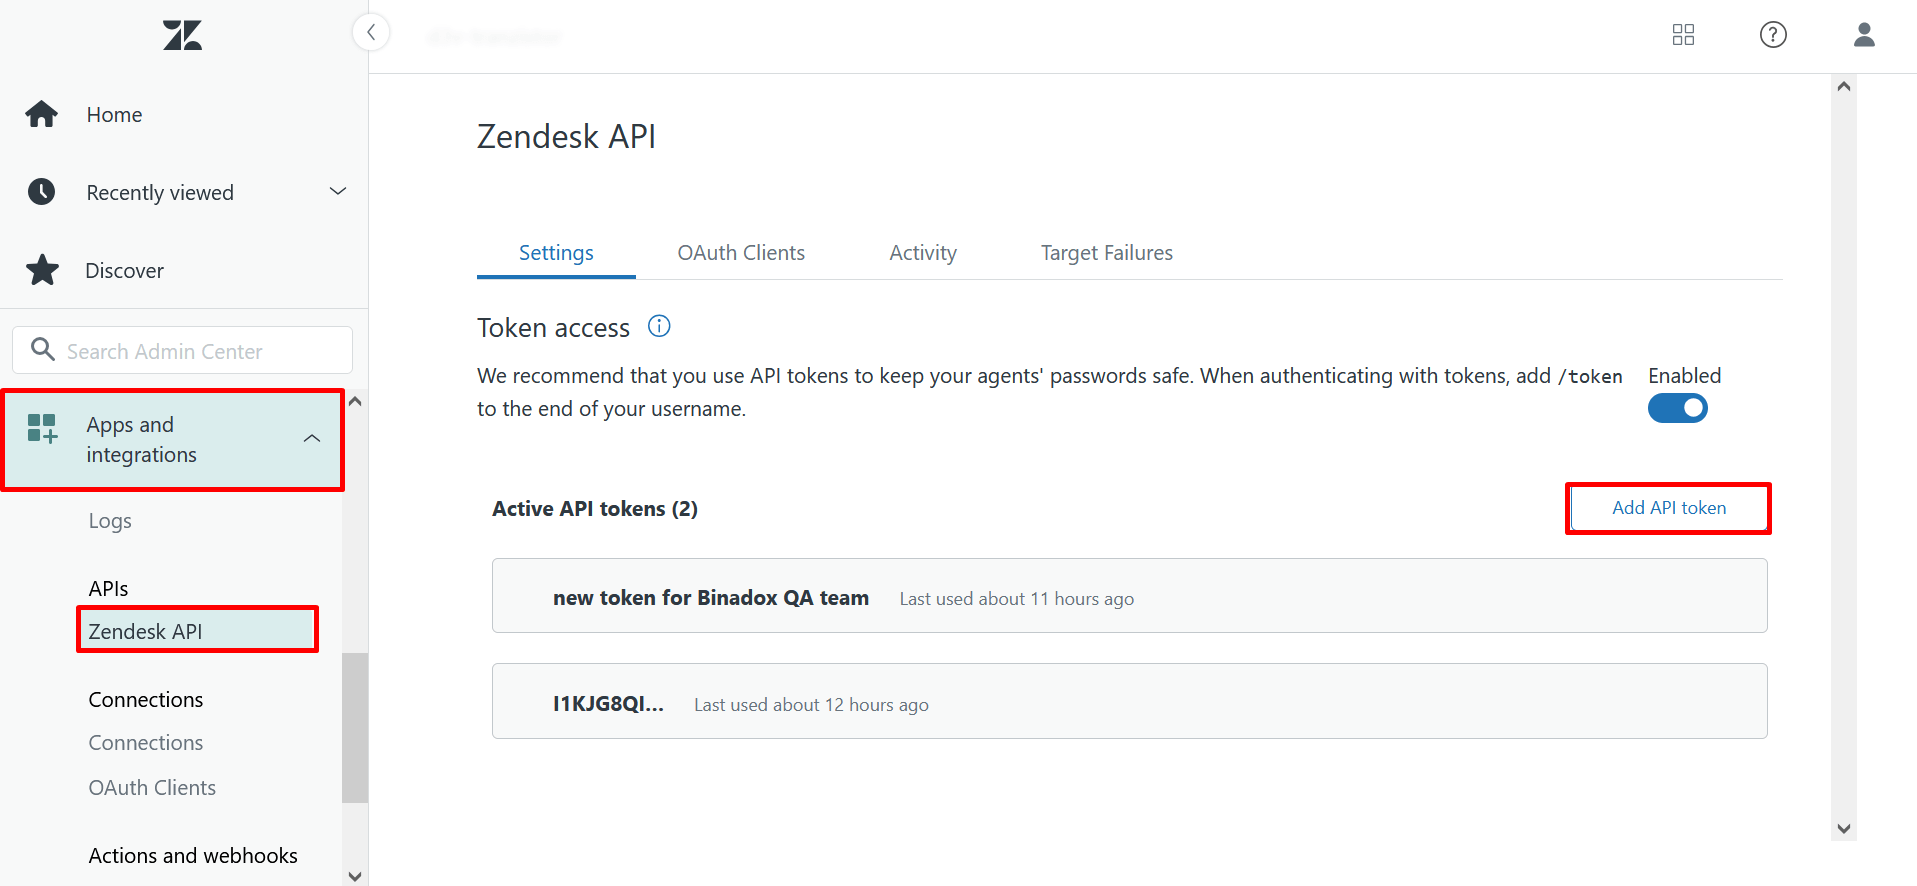
3. In the sidebar of the Admin panel, select Zendesk API in the Apps and integrations section. On the Settings tab of the Zendesk API view, enable Token Access using the toggle button. Click the Add API token button in the Active API Tokens section to generate a new API token.

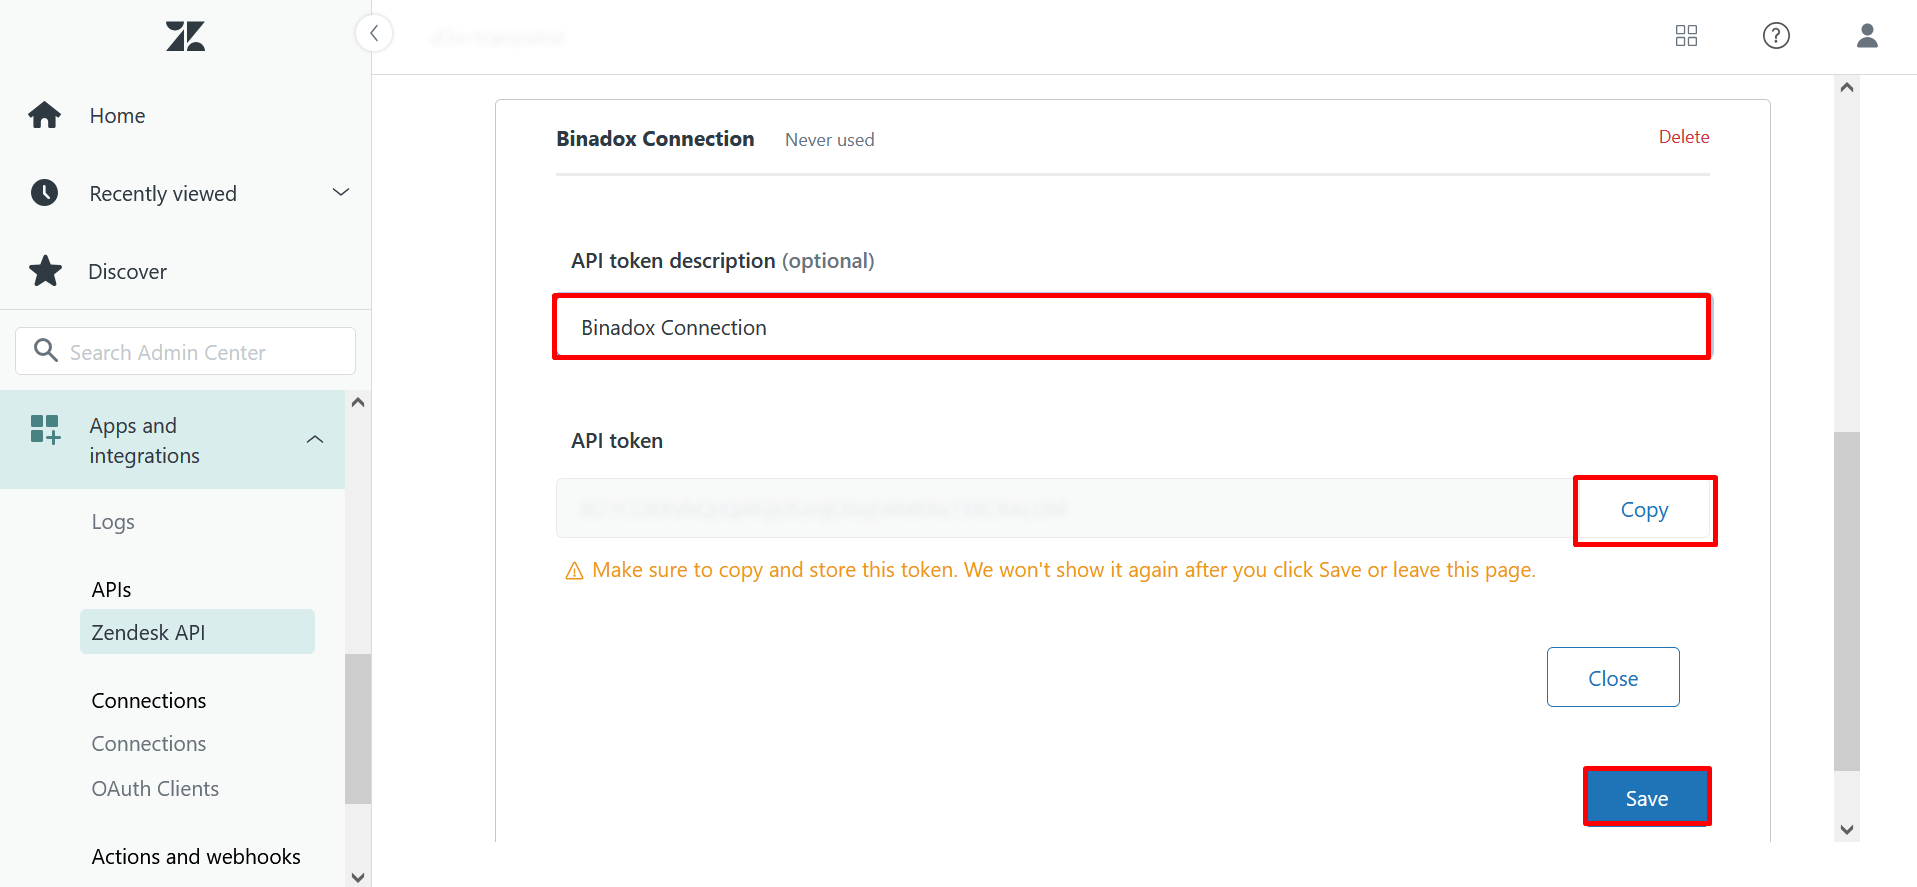
4. Provide a description for a new token for further identification in the API Token Description (optional) field. Click the Copy button to copy the token to the clipboard. Note that you won’t be able to see it again. Make sure to keep this value safe. Click Save.

2. Configure Zendesk Ticketing in Binadox
1. Log into your Binadox account.
2. In the navigation pane on the left, click System Configuration > Ticketing Sytems. Click Connect Ticketing system.

3. Select Zendesk from the list.

4. Create a meaningful connection instance name. Click Continue.

5. Fill in the connection properties. Enter an email address of the Zendesk Support admin account into the Email field. Paste the API token into the API Token field (see Clause 1 on how to generate an API token). Indicate your Zendesk domain name in the Domain field (e.g. https://your_subdomain.zendesk.com). Click Continue.

6. Fill in the requester information. It will be associated with the one who creates tickets in Binadox (e.g. Binadox administrator). Enter a requester name and an email address into the corresponding fields. Click Connect.

7. Confirm connection by the link from your e-mail address.

8. Upon successful Zendesk ticketing configuration, the connection status will switch into Connected.

