GitLab Integration
Overview
This guide is designed to help you seamlessly connect your GitLab projects with Binadox. Whether you’re a developer, project manager, or DevOps professional, this integration will provide valuable data and tools to optimize your software development lifecycle. Follow this step-by-step guide to set up the integration quickly and efficiently.
Once integrated, pricing will be automatically calculated after each push to the repository and added as a comment to the commit. Ensure that your account has the necessary permissions to write comments. If permissions are not granted, comments will appear every 24 hours. While this step is optional, it’s highly recommended for immediate feedback.
Integration Steps
1. Generate a Secret Token in Binadox
Log in to your Binadox account.
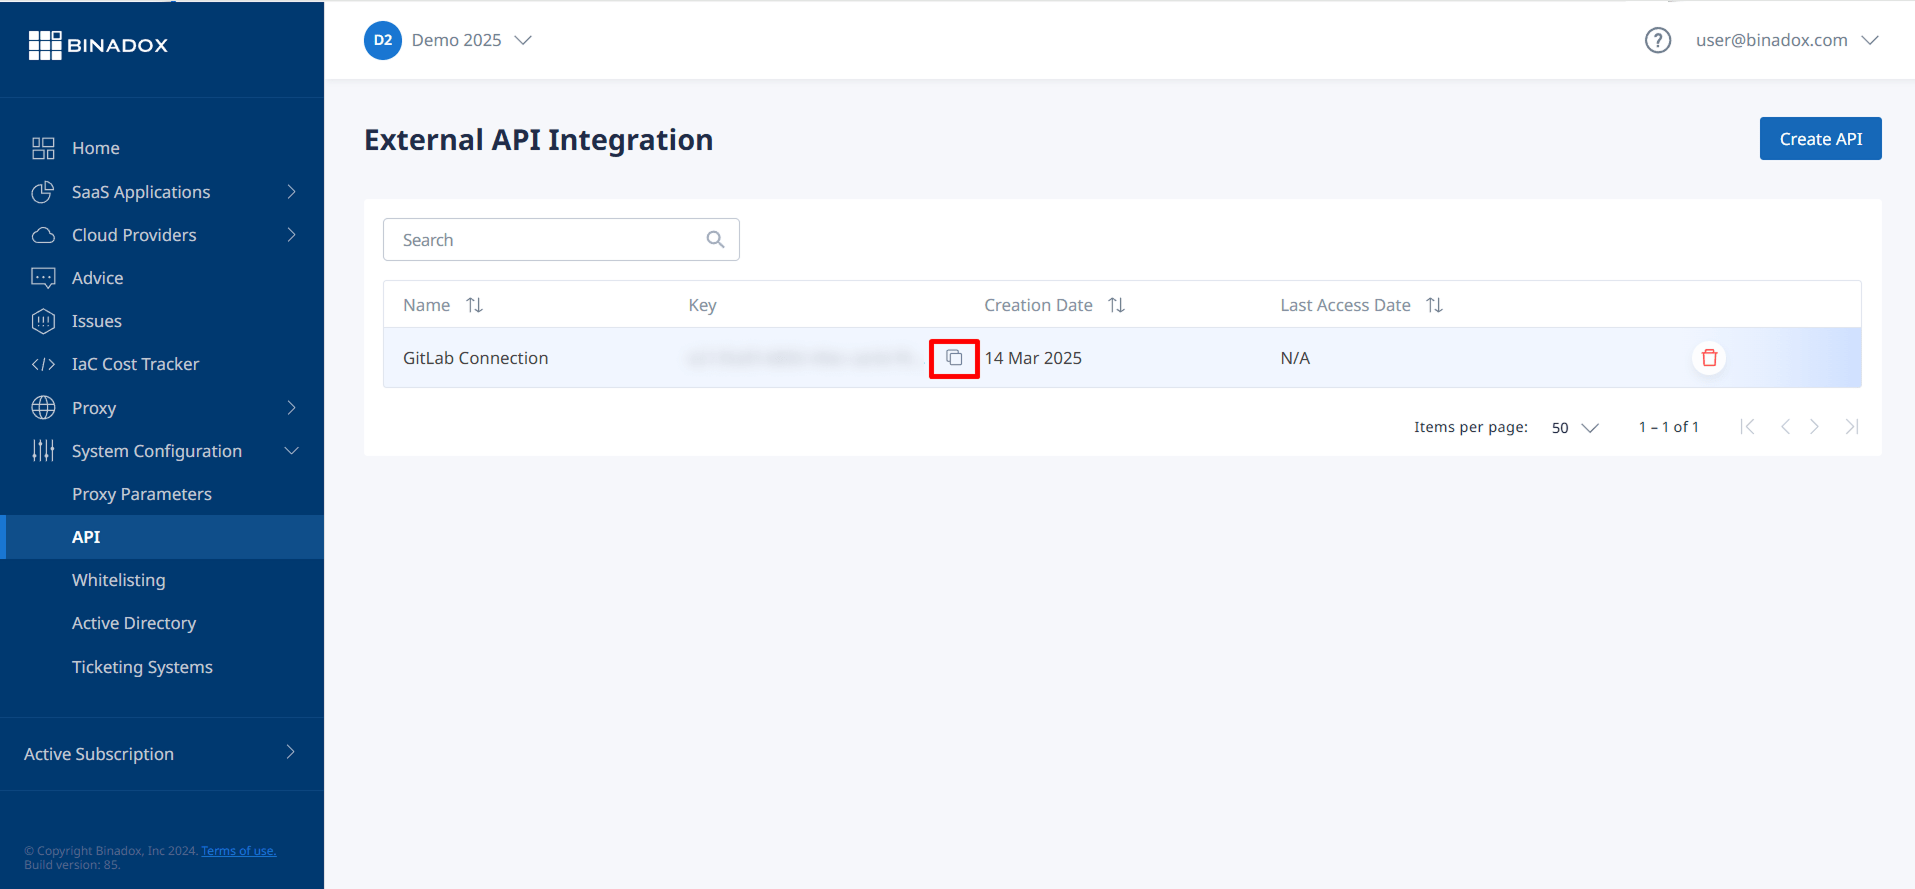
Navigate to System Configuration > API. Click the Create API button.

Enter a descriptive name for your API token in the Name field (e.g., “GitLab Connection”). Click Save.

Copy and securely store the generated API key. You’ll need this in step 3.
2. Create a New Configuration File
To successfully integrate Binadox with a GitLab account, in the root directory of your GitLab project, create a new file named .gitlab-ci.yml.
3. Set Required Variables
You need to set three variables in your GitLab project settings:
- BINADOX_SERVER_URL: https://prod.binadox.com/api/1/organizations/pricing/callback/analyze_iaac
- BINADOX_PROJECT_NAME: Your project name (should be the same as the name you entered in step 7)
- BINADOX_SECRET_TOKEN: The API key generated in step 1 (Keep this value secret)
Note:
You must be a project member with the Maintainer role.
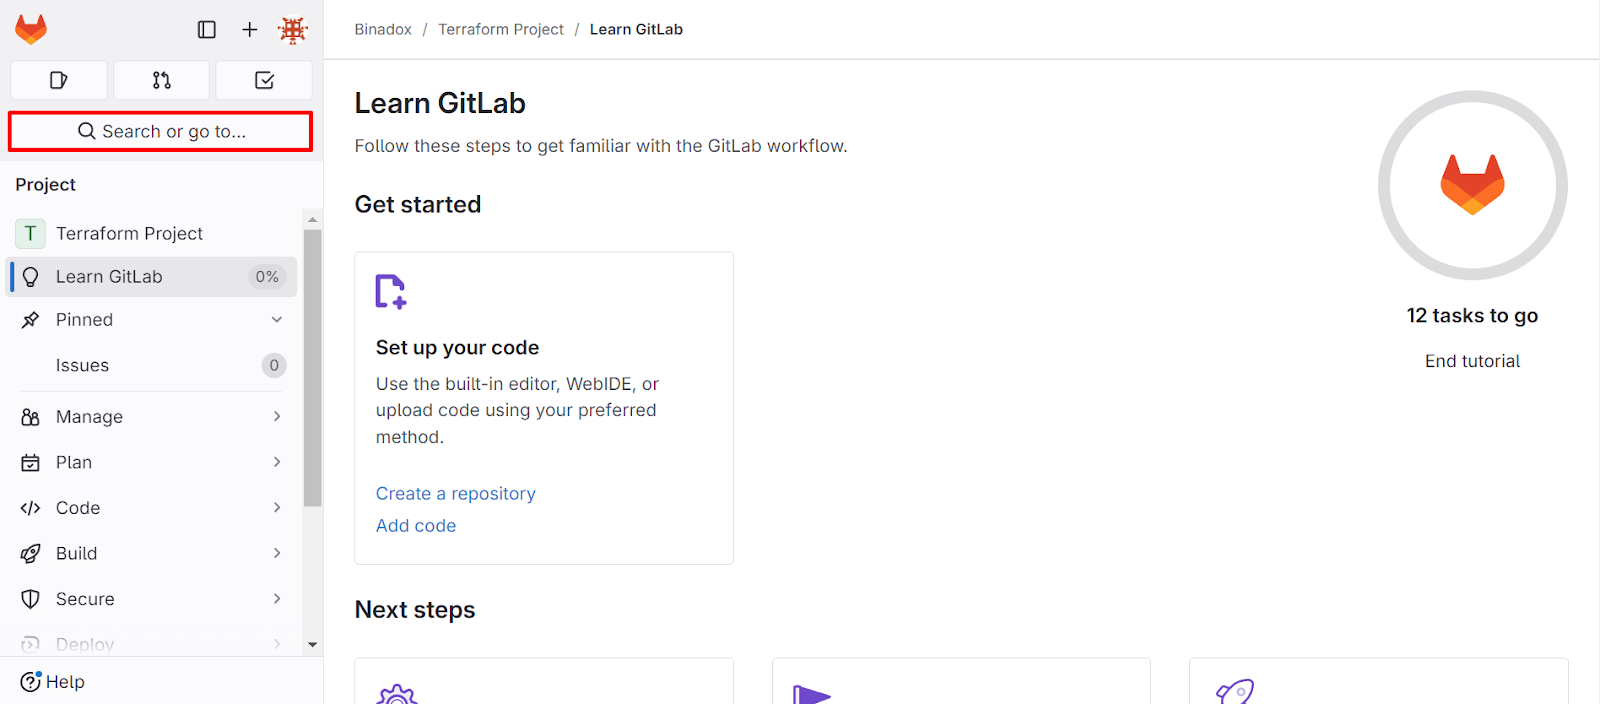
Log in to your GitLab account. From the GitLab dashboard, find your project using one of these methods:
- Use the search bar at the top of the page to search for your project name.
- Navigate through your groups and projects listed on the left sidebar.
- If it’s a recent project, it may be listed on your dashboard.
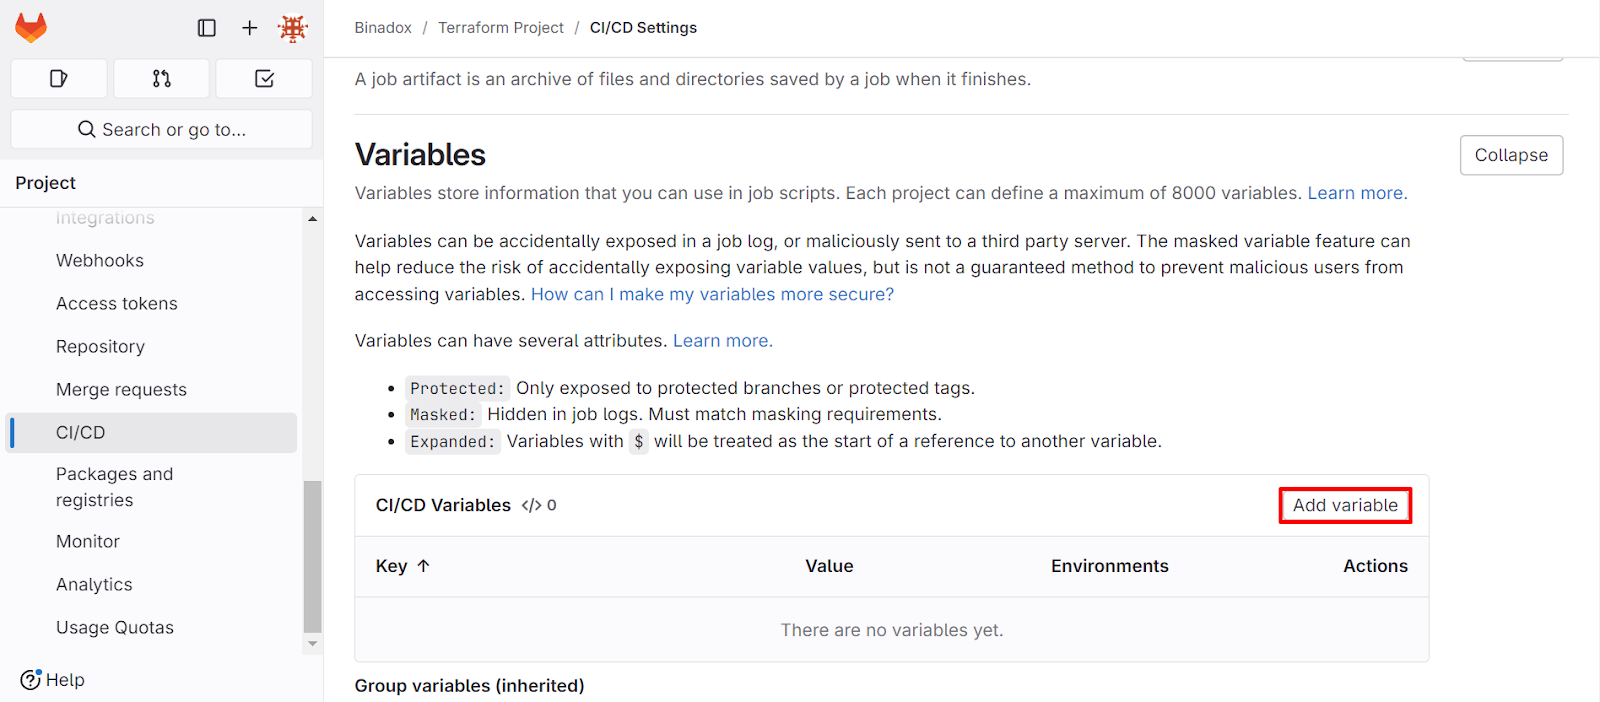
In the left sidebar of your project page, click on Settings > CI/CD.

On the CI/CD Settings page, expand the Variables section. Click Add variable for each of the required variables.
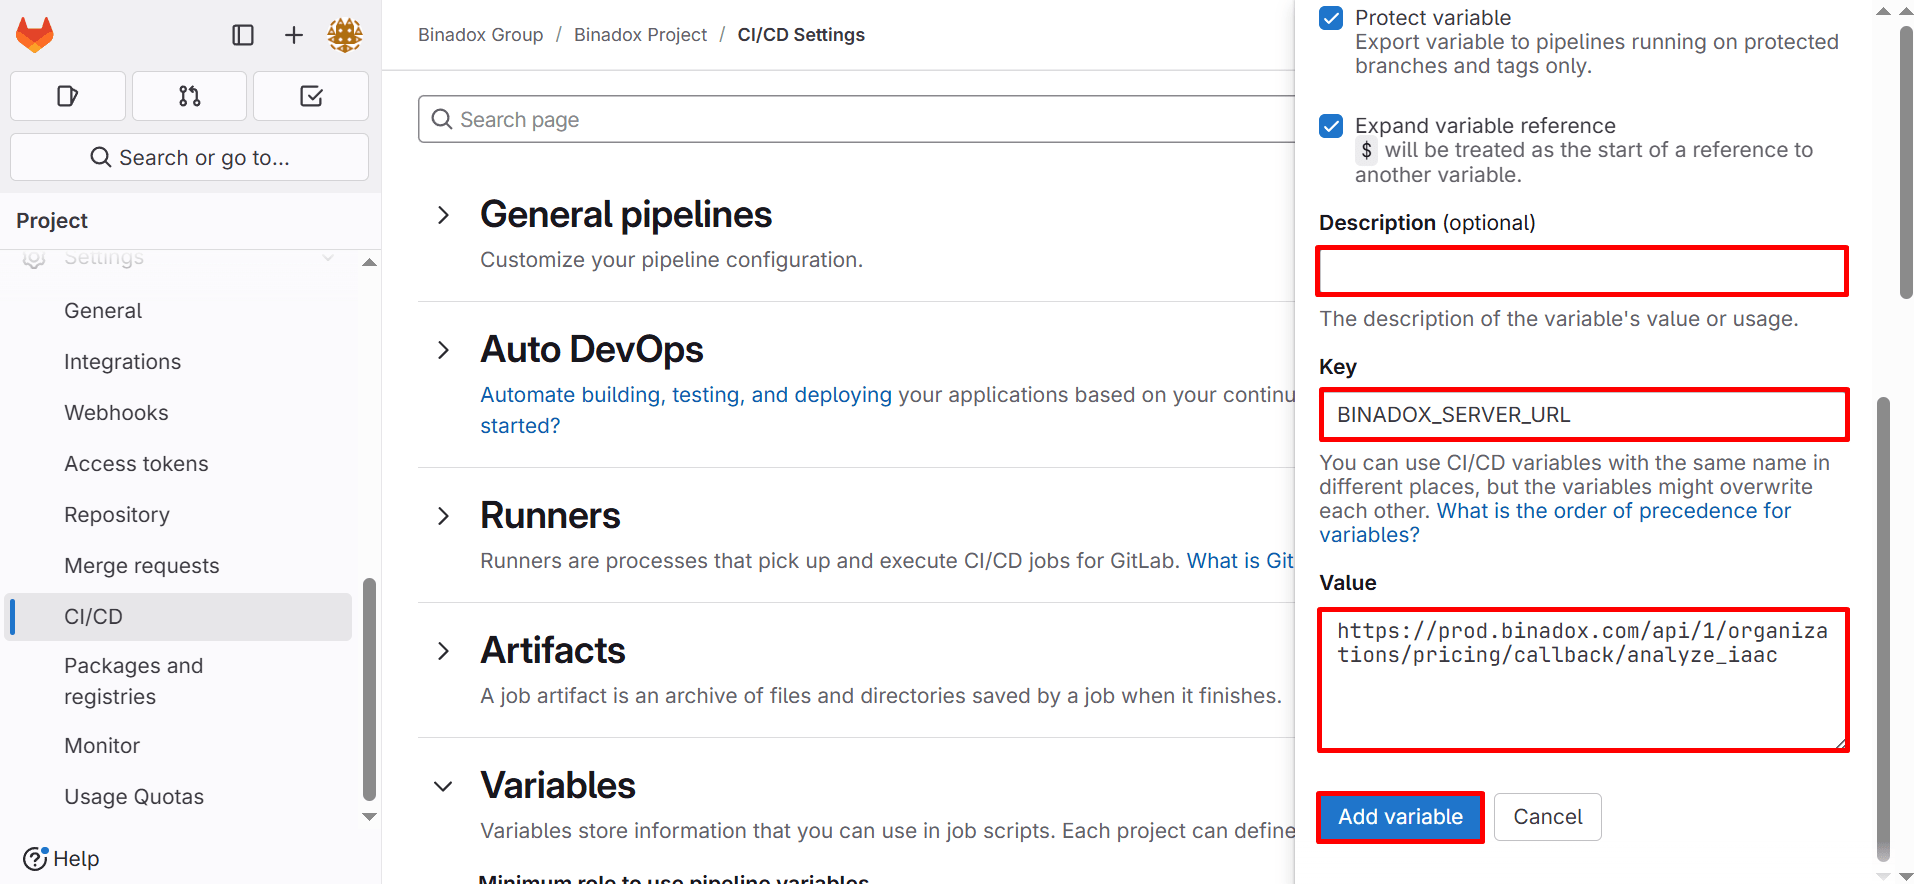
For each variable, fill in the following fields:
- Type: Select “Variable”
- Environments: Leave as “All (default)” unless you need environment-specific settings
- Visibility:
- Visible: Shown in job logs and variable settings
- Masked: Hidden in job logs, visible in settings
- Masked and hidden: Hidden in both logs and settings
- Protect variable: Enable if you want to restrict the variable to protected branches/tags.
- Expand variable reference: Usually left checked

- Description: Optional;
- Key: Use the exact names listed above (e.g., BINADOX_SERVER_URL)
- Value: https://prod.binadox.com/api/1/organizations/pricing/callback/analyze_iaac
4. Configure the GitLab CI File
Copy the following content into your .gitlab-ci.yml file:
stages:
- binadox-analyze
build-job:
stage: binadox-analyze
allow_failure: true
script:
- echo "Sending Data to Binadox"
- if [[ -n $CI_MERGE_REQUEST_ID ]]; then
export EVENT_NAME=pull_request;
else
export EVENT_NAME=push;
fi
- RESULT=$(curl -sw '%{http_code}' -X POST "$BINADOX_SERVER_URL"
-H 'Content-Type:application/json'
-H "Authorization:ApiToken "$BINADOX_SECRET_TOKEN""
-d "{
\"project\":\""$BINADOX_PROJECT_NAME"\",
\"gitlab_data\":{
\"eventName\":\""$EVENT_NAME"\",
\"branch\":\""$CI_COMMIT_REF_NAME"\",
\"commit\":\""$CI_COMMIT_SHA"\",
\"workspace\":\""$CI_PROJECT_NAMESPACE"\",
\"repository\":\""$CI_PROJECT_NAME"\"
}
}")
- echo $RESULT
- if [[ $RESULT == 200 ]]; then
echo "Binadox Structure-As-Code Analyzer Request sent";
exit 0;
else
echo "Binadox Structure-As-Code Analyzer Request failed";
exit 1;
fi
only:
- pushes
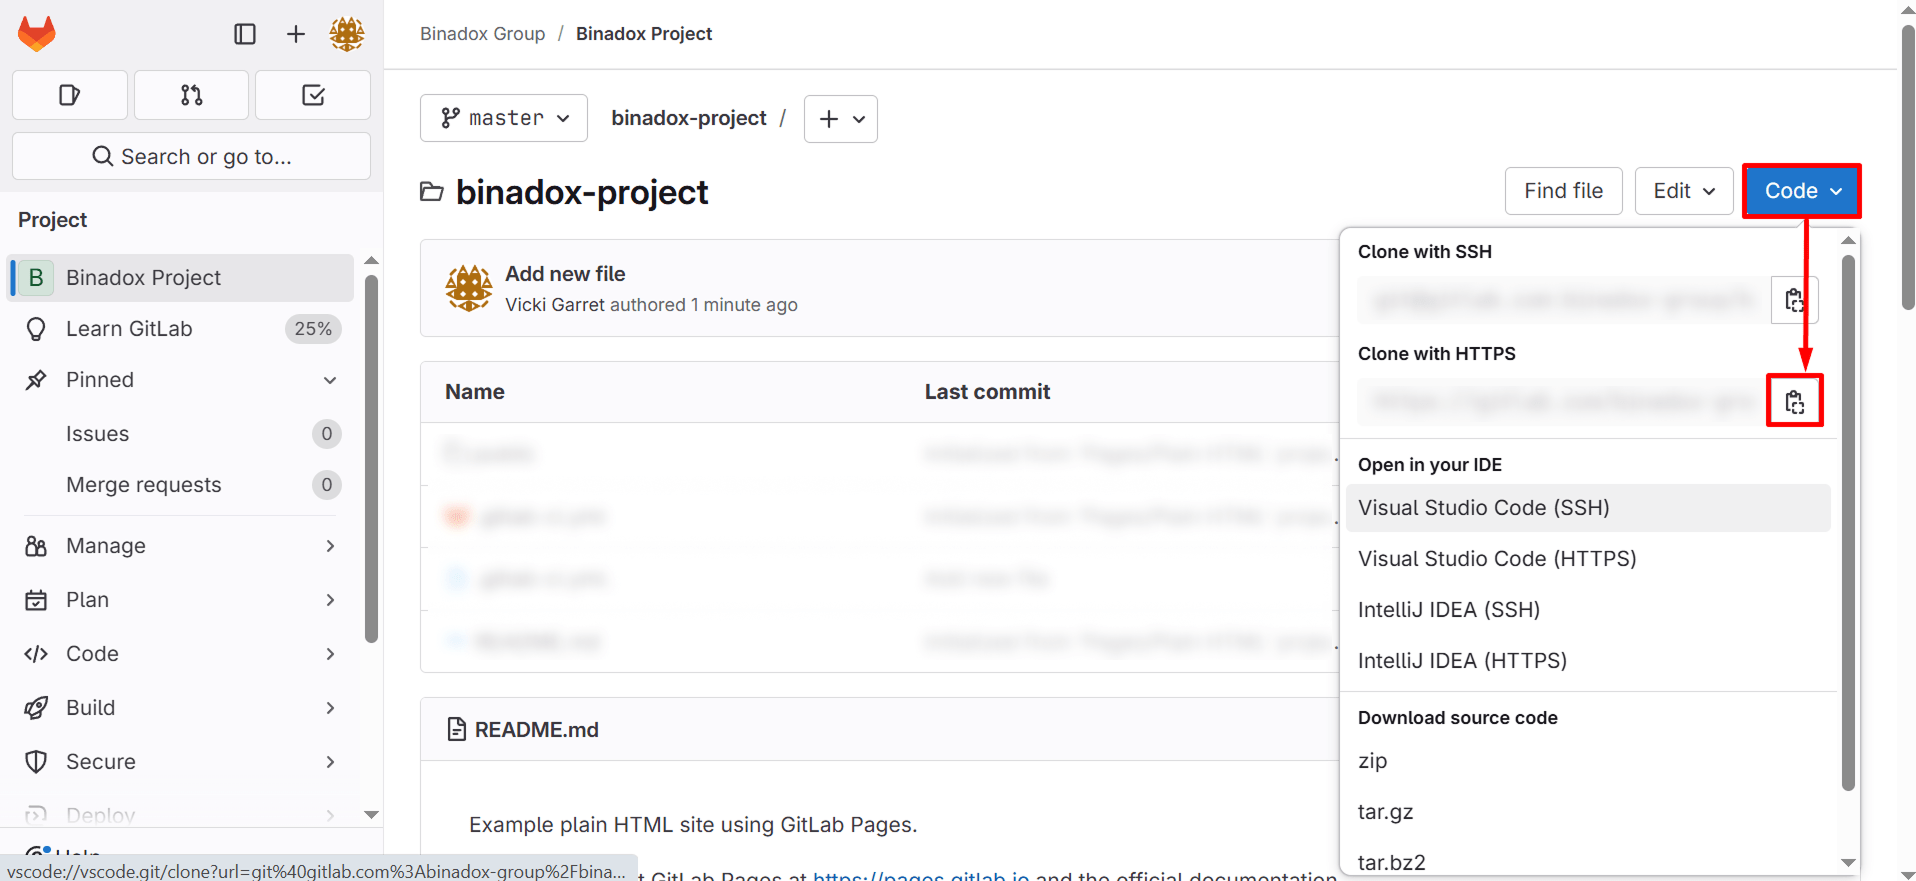
- merge_requests5. Get HTTPS of GitLab Project
Click the Code dropdown button and select Clone with HTTPS from the menu. Click the copy icon.
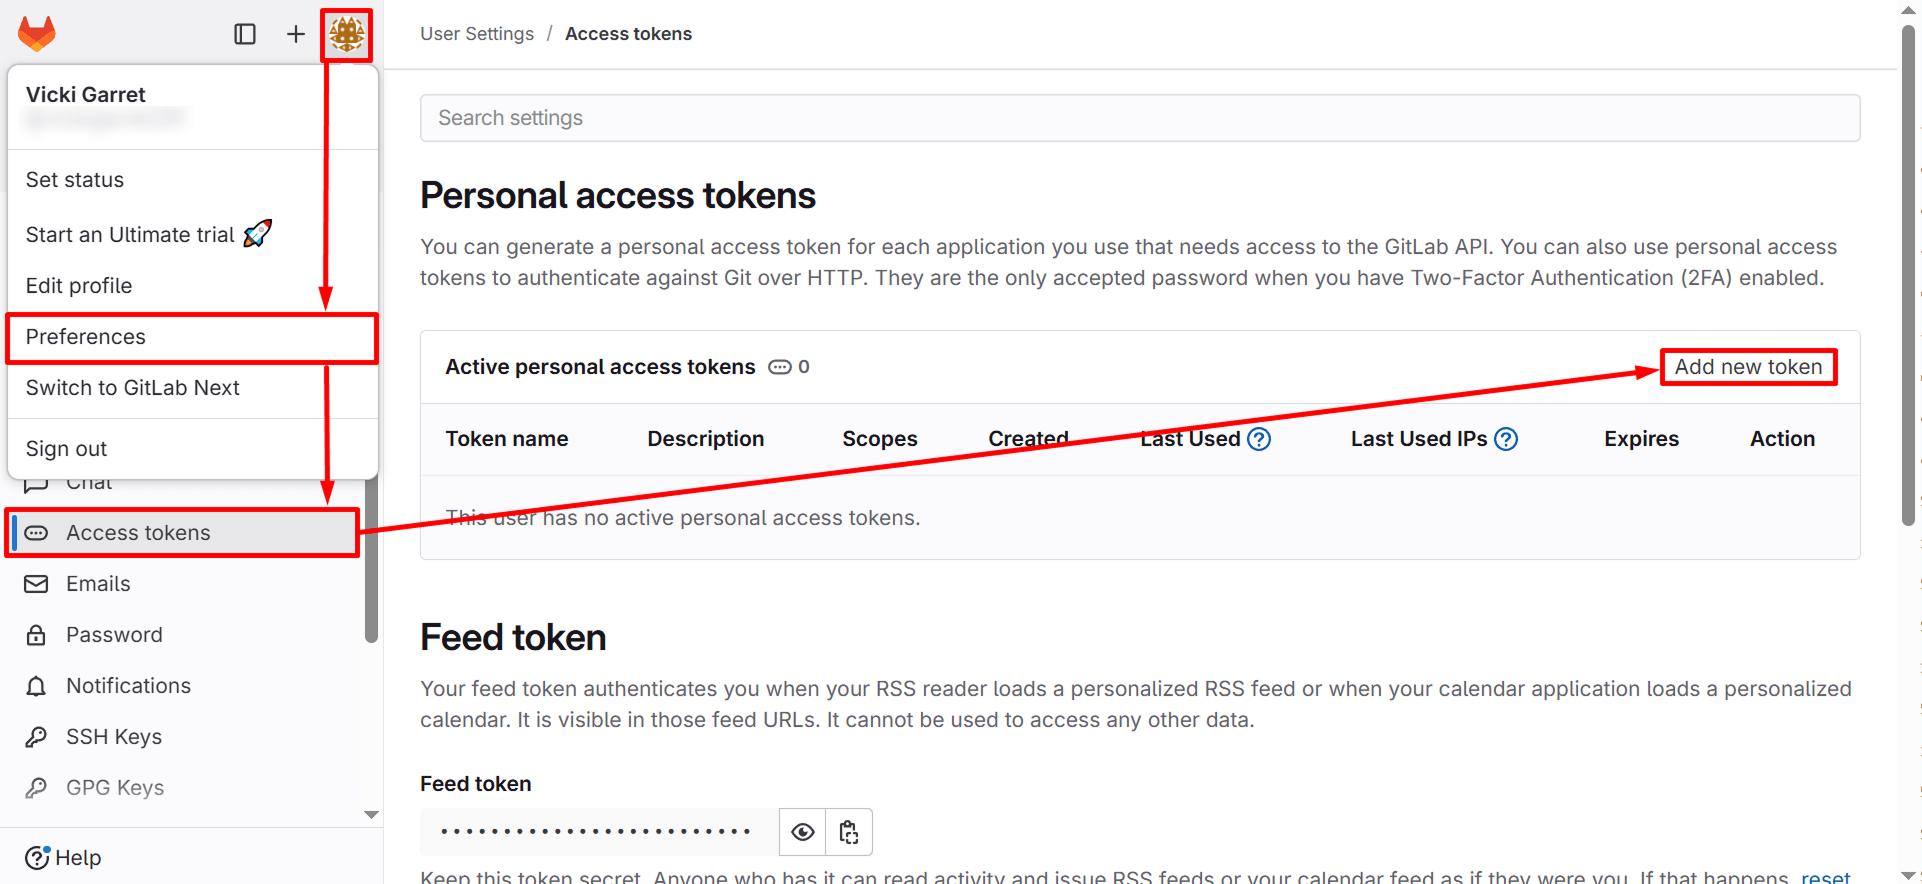
6. Create GitLab Access Token
Click on your profile icon in the top-right corner. Select Preferences from the dropdown menu In the left sidebar, click on Access tokens. Click the Add new token button.
Enter a descriptive name for your token (e.g., “Binadox Connection”) in the Token name field. Set an appropriate expiration date based on your security requirements.

In the Scopes section, check the following boxes to grant necessary permissions:
- api – Grants complete API access,
- read_api – Allows read-only access to the API,
- create_runner – Enables creation of CI/CD runners,
- manage_runner – Allows management of existing CI/CD runners,
- read_repository – Grants read access to repositories,
- write_repository – Allows writing to repositories
Click the Create personal access token button to generate your token.

Copy and securely store the generated token. The token will be needed in the next step to authenticate your connection to GitLab.
IMPORTANT:
When the token appears, immediately copy it to a secure password manager or other secure location. This token will only be displayed once and cannot be retrieved later.
7. Configure Binadox to Connect with Your GitLab Repository
Navigate to the IaC Cost Tracker page by selecting it from the left navigation menu. Click the Add project button.

In the Creating New Project dialog box, complete the following fields:
- Project name: Enter a descriptive name that clearly identifies this project within Binadox
- HTTPS: Paste the HTTPS URL of your GitLab repository that you copied in step 5. The format should be: https://gitlab.com/your-group/your-project.git
- Username: Enter your GitLab username that has access to this repository
- Token: Paste the personal access token you created in step 6. This token allows Binadox to securely connect to your repository without storing your password
Click the Next button.

Select the appropriate Git branch to track (typically “main” or “master”). Click the Next button.

Select the directory containing your infrastructure code. Click the Create project button.
You’ve successfully integrated GitLab with Binadox and can now track infrastructure costs automatically with each code change.