Categories
Getting Started
Updates
Cloud Solutions
Cloud Integrations
SaaS Integrations
Proxy Configuration
Ticketing and Financial Systems Integrations
IaC Cost Tracker Guides
GitLab Integration
Overview
This guide is designed to help you seamlessly connect your GitLab projects with Binadox. Whether you’re a developer, project manager, or DevOps professional, this integration will provide valuable data and tools to optimize your software development lifecycle. Follow this step-by-step guide to set up the integration quickly and efficiently.
Once integrated, pricing will be automatically calculated after each push to the repository and added as a comment to the commit. Ensure that your account has the necessary permissions to write comments. If permissions are not granted, comments will appear every 24 hours. While this step is optional, it’s highly recommended for immediate feedback.
Integration Steps
1. Create a New Configuration File
To successfully integrate Binadox with a GitLab account, in the root directory of your GitLab project, create a new file named .gitlab-ci.yml.
2. Set Required Variables
You need to set three variables in your GitLab project settings:
- BINADOX_SERVER_URL
- BINADOX_PROJECT_NAME
- BINADOX_SECRET_TOKEN
Note:
You must be a project member with the Maintainer role.
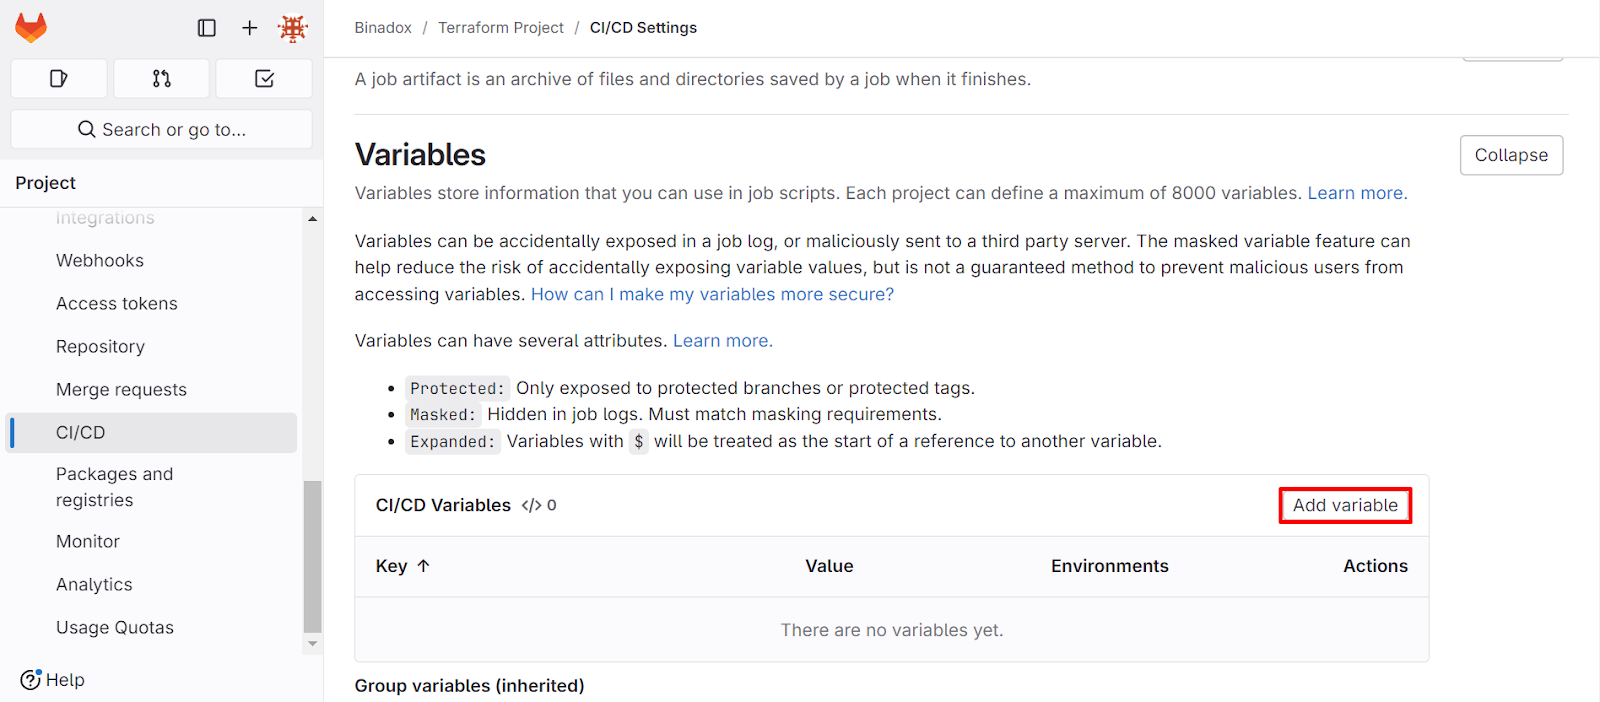
Log in to your GitLab account. From the GitLab dashboard, find your project using one of these methods:
- Use the search bar at the top of the page to search for your project name.
- Navigate through your groups and projects listed on the left sidebar.
- If it’s a recent project, it may be listed on your dashboard.
In the left sidebar of your project page, click on Settings > CI/CD.

On the CI/CD Settings page, expand the Variables section. Click Add variable for each of the required variables.
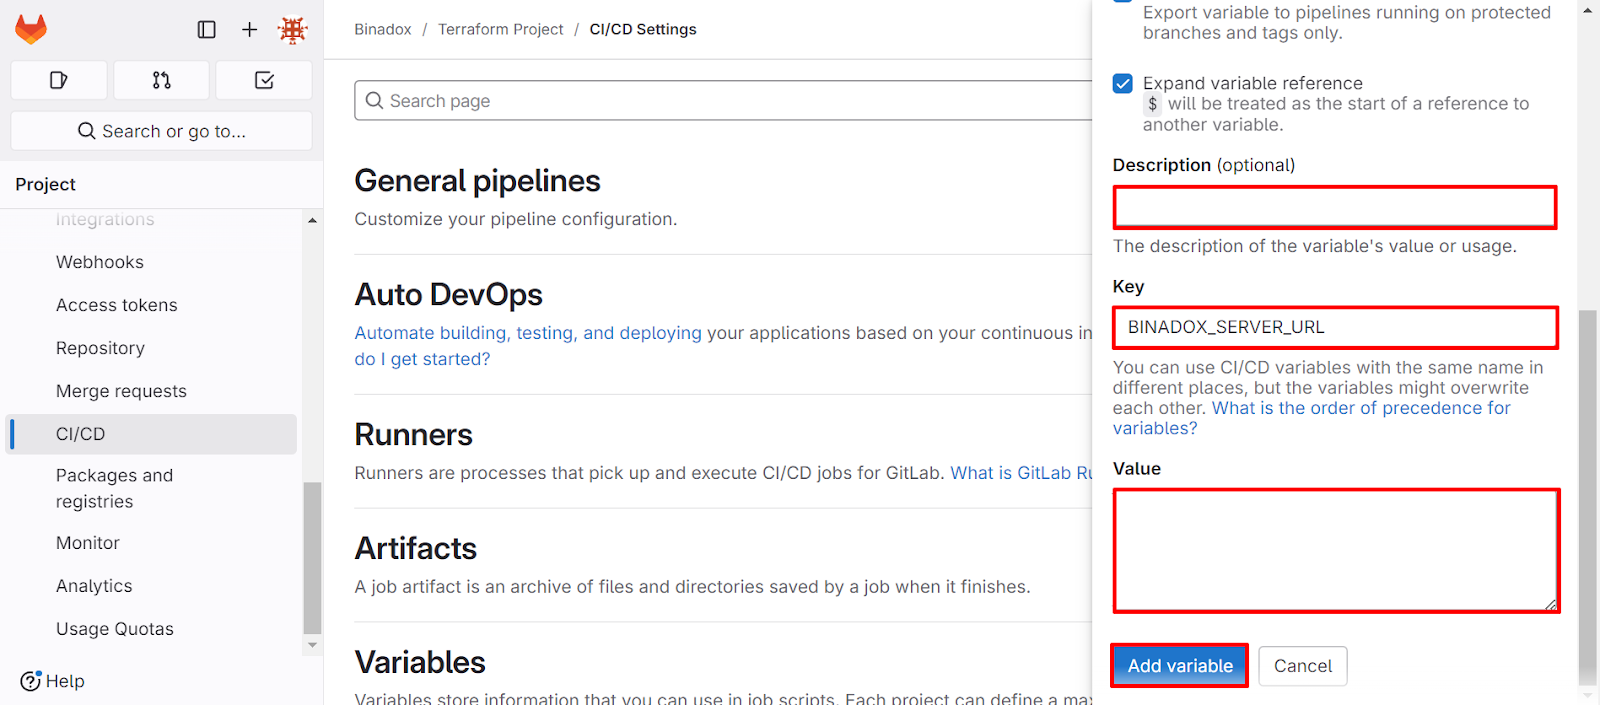
For each variable, fill in the following fields:
- Type: Select “Variable”
- Environments: Leave as “All (default)” unless you need environment-specific settings
- Visibility:
- Visible: Shown in job logs and variable settings
- Masked: Hidden in job logs, visible in settings
- Masked and hidden: Hidden in both logs and settings
- Protect variable: Enable if you want to restrict the variable to protected branches/tags.
- Expand variable reference: Usually left checked

- Description: Optional;
- Key: Use the exact names listed above (e.g., BINADOX_SERVER_URL)
- Value: No limitations.
3. Configure the GitLab CI File
Copy the following content into your .gitlab-ci.yml file:
stages:
  - binadox-analyze
build-job:
  stage: binadox-analyze
  allow_failure: true
  script:
    - echo "Sending Data to Binadox"
    - if [[ -n $CI_MERGE_REQUEST_ID ]]; then
        export EVENT_NAME=pull_request;
      else
        export EVENT_NAME=push;
      fi
    - RESULT=$(curl -sw '%{http_code}' -X POST "$BINADOX_SERVER_URL"
      -H 'Content-Type:application/json'
      -H "Authorization:ApiToken "$BINADOX_SECRET_TOKEN""
      -d "{
      \"project\":\""$BINADOX_PROJECT_NAME"\",
        \"gitlab_data\":{
          \"eventName\":\""$EVENT_NAME"\",
          \"branch\":\""$CI_COMMIT_REF_NAME"\",
          \"commit\":\""$CI_COMMIT_SHA"\",
          \"workspace\":\""$CI_PROJECT_NAMESPACE"\",
          \"repository\":\""$CI_PROJECT_NAME"\"
        }
      }")
    - echo $RESULT
    - if [[ $RESULT == 200 ]]; then
       echo "Binadox Structure-As-Code Analyzer Request sent";
       exit 0;
      else
       echo "Binadox Structure-As-Code Analyzer Request failed";
       exit 1;
      fi
  only:
    - pushes
    - merge_requests
This configuration sets up a job that sends project data to Binadox on every push and merge request.
This powerful combination will provide you with enhanced visibility into your development processes, helping you make data-driven decisions to improve code quality and project efficiency.
Was this article helpful?
Thanks for the feedback!
Go Up