Categories
Getting Started
Cloud Solutions
Cloud Integrations
SaaS Integrations
Proxy Configuration
Ticketing and Financial Systems Integrations
IaC Cost Tracker Guides
Power BI Integration
This is a guide for integrating the Power BI service with the multi-cloud cost management platform Binadox. Power BI is a solution that helps companies to connect to and visualize any data using the unified, scalable platform for self-service and enterprise business intelligence (BI) that’s easy to use and helps you gain deeper data insight.
To successfully integrate Binadox with a Power BI service, it is required to get the necessary credentials in Azure Directory, add them to the Binadox, and connect the application.
Note: Binadox can monitor only the Power BI service. The Power BI Desktop monitoring is not possible due to Microsoft limitations.
Contents
1. Connect Office 365 with Power BI license to Binadox
2. Configure required permission in Azure Directory
3. Locate Integration Data on the Azure Portal
4. Create New Connection for Power BI in Binadox
1. Connect Office 365 with Power BI license to Binadox
Connect Office 365 to Binadox, in order to connect and start monitoring Power BI service.
To do that, view the step-by-step guide for Office 365 Integration with Binadox.
2. Configure required permission in Azure Directory
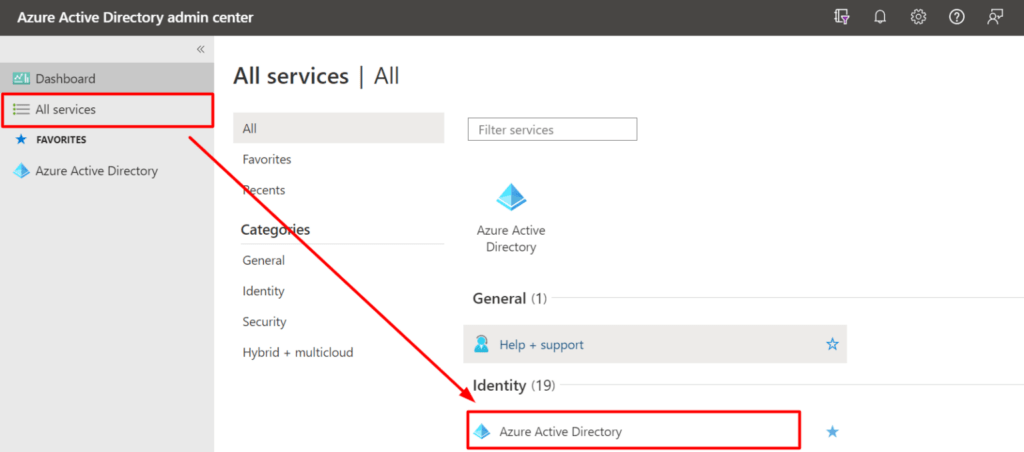
1. Log into the Microsoft Azure portal as a global administrator. In the navigation pane on the left, click All services > Identity > Azure Active Directory. Use the search bar, if necessary.
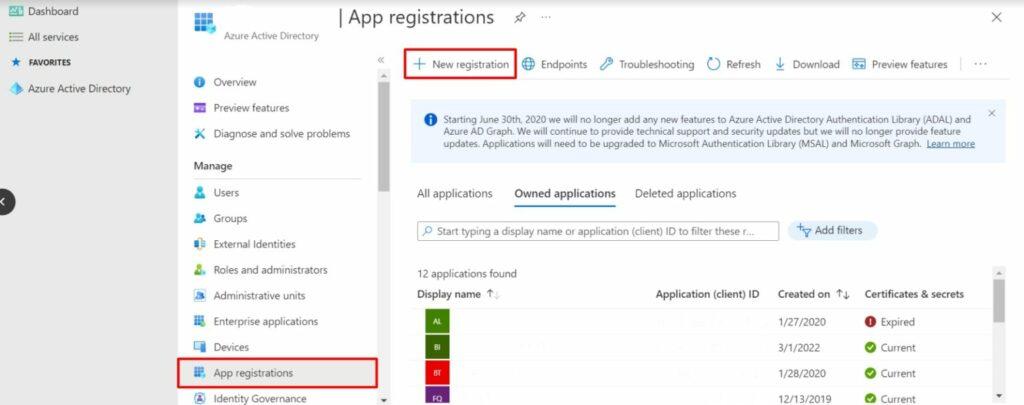
2. Go to the App registrations section and select the app that has already been registered when creating Office 365 integration with Binadox.
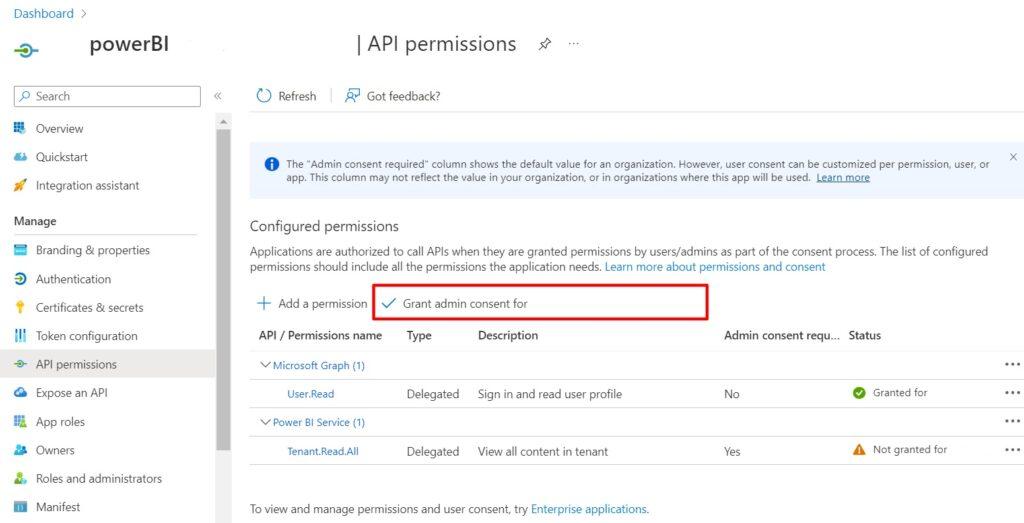
3. In the navigation pane, choose API permissions. Once you’re on the API Permissions page, click the Add a permission button in the Configured Permissions section. On the Request API permissions page that opens, scroll down the permissions list and select Power BI Service. Then, select Delegated permissions card, scroll down the permissions and select Tenant drop-down list. Select Tenant.Read.All checkbox and click Add permissions button.
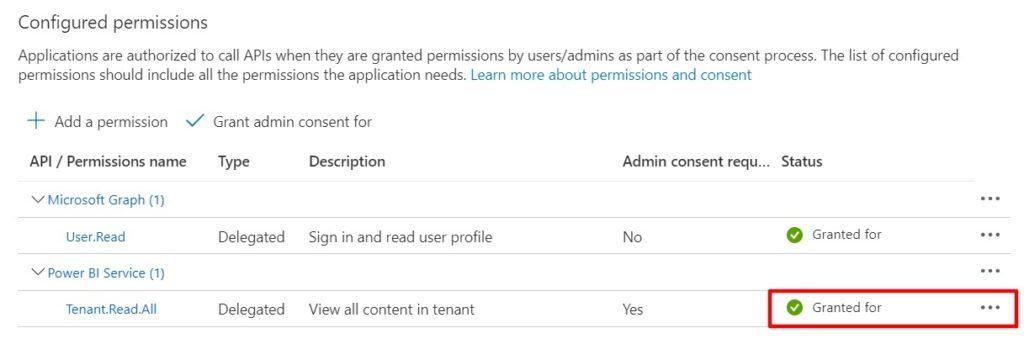
4. Grant consent for the required permissions for all accounts in your organization to be able to view Power BI Service data. Click Grant admin consent for (the name of your organization) and the status will change to Granted. It means that all the required permissions are granted and the data will be displayed in a day.
3. Locate Integration Data on the Azure Portal
1. To find the Tenant domain, Application ID, and Client Secret, sign in to the Microsoft Azure portal as a global administrator. Navigate to Azure Active Directory.
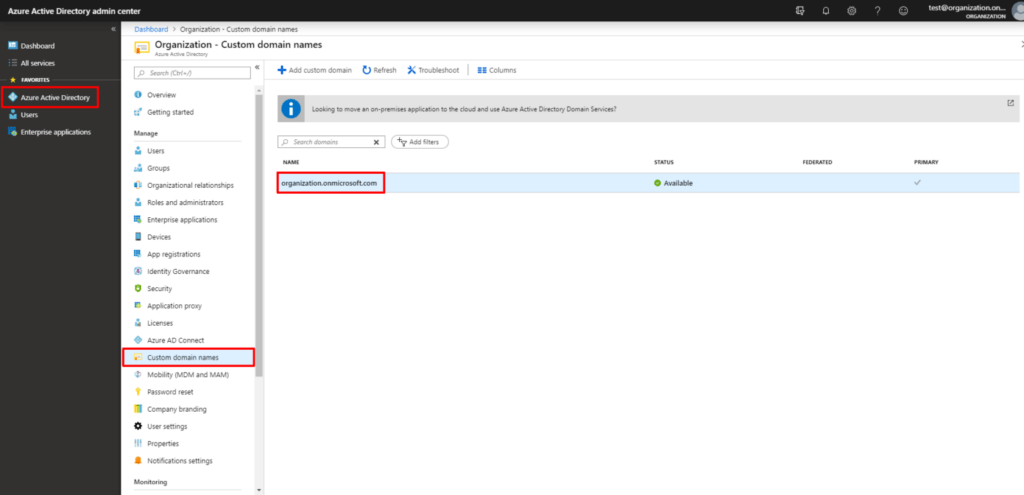
2. To locate the Tenant domain, click Custom domain names. Copy your tenant domain from the Name field (e.g. organization.onmicrosoft.com). You may also hover the mouse pointer over the profile information at the top right corner of the menu bar to see the tenant domain.
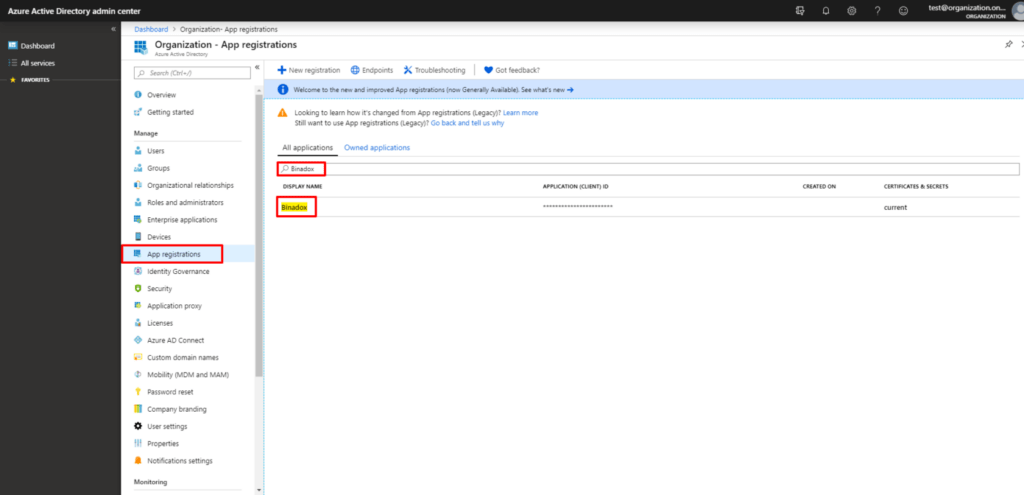
3. To locate an Application (client) ID, click Azure Active Directory > App registrations in the navigation pane on the left. Click on the name of the Binadox application. To quickly locate it, type in its name in the search bar.
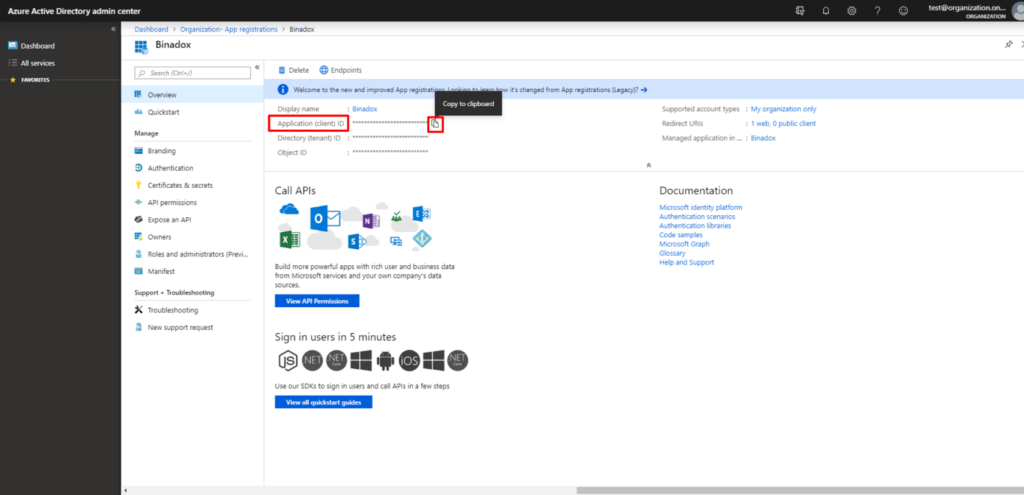
4. To copy an Application (client) ID, hover the mouse pointer over the value. Click on the appeared icon to copy it to the clipboard.
5. To generate a new Client Secret, go to the Certificates and secrets section and click the New client secret button.
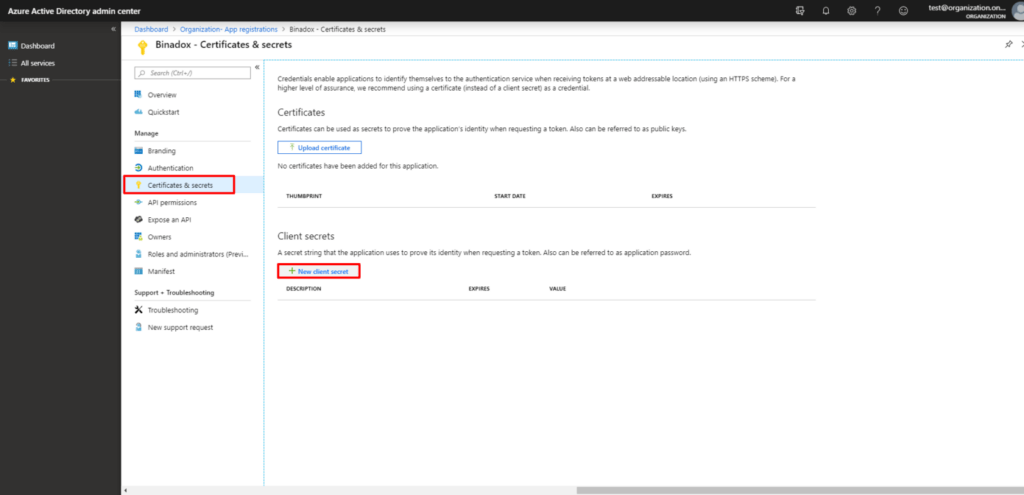
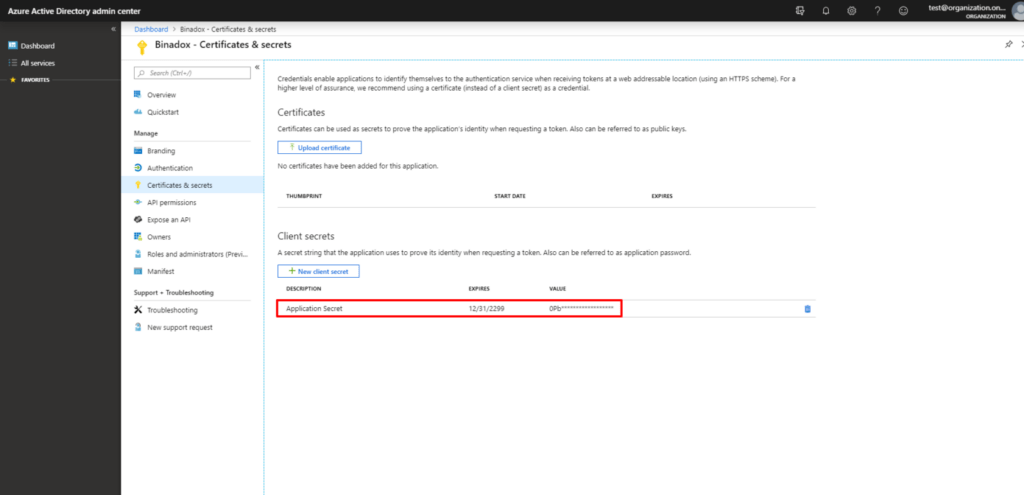
6. Make a Description for your client secret, select its duration in the Expires section and click the Add button.
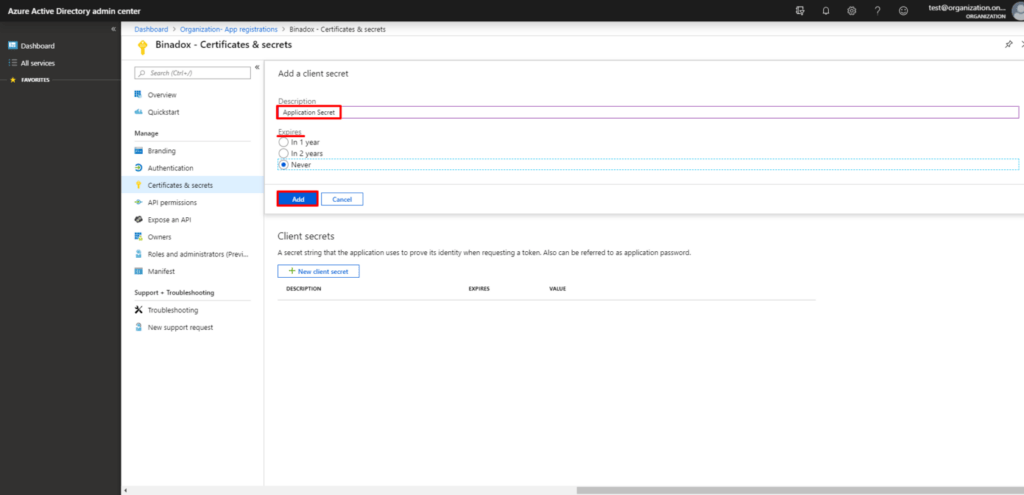
7. Hover the mouse pointer over the value and click on the appeared icon to copy it to the clipboard.
4. Create New Connection for Power BI in Binadox
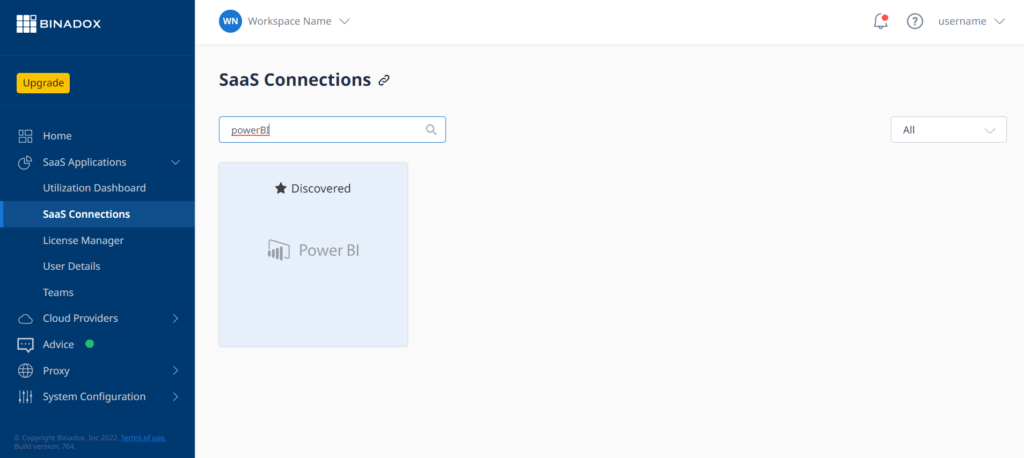
- When the necessary steps in Azure Directory are done, you can log in to your Binadox Workspace.
- Proceed to the SaaS Connections and connect the Power BI.
3. To do that, create a connection name.
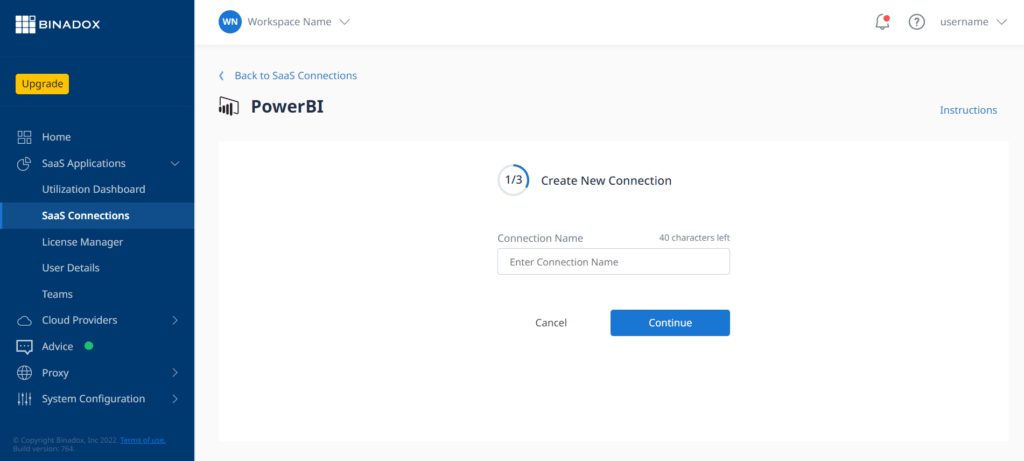
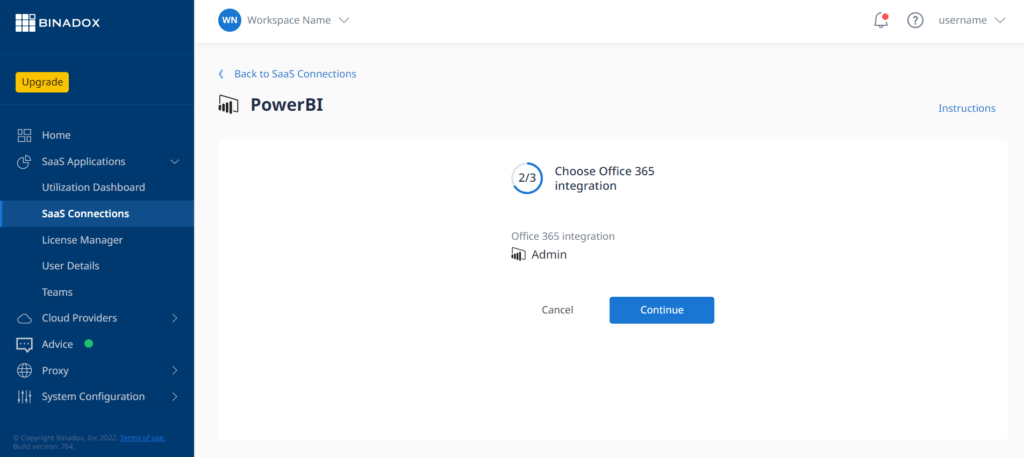
4. Select the Office 365 integration.
5. Then, you need to paste data copied from Azure Directory: Tenant domain, Application ID, and Client Secret.
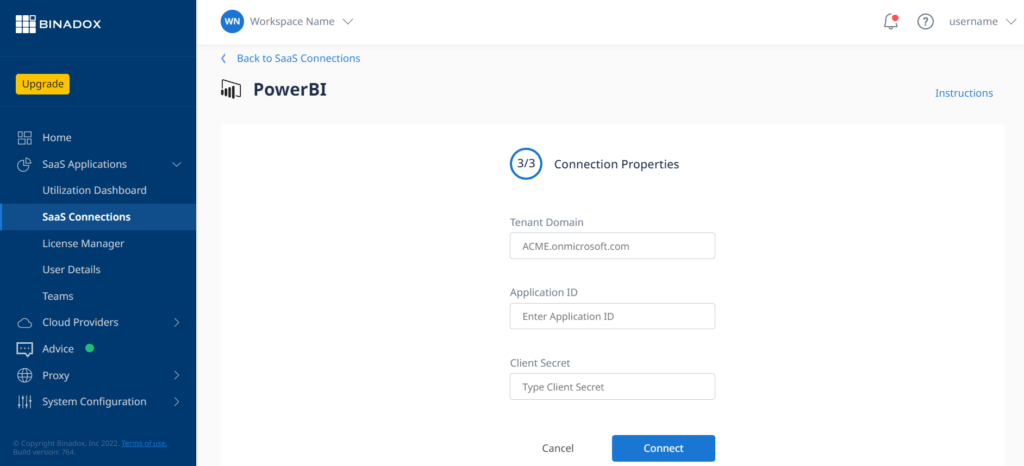
6. After that, you can click the Connect button, and monitor Power BI Service data.
Was this article helpful?
Thanks for the feedback!
Go Up